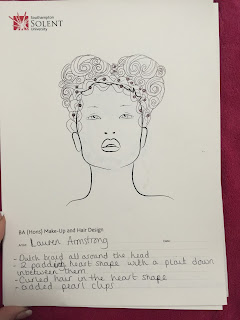
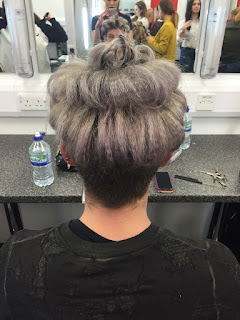
Lauren's Design
Intructions.
1 Begin by sectioning off two inches from around the hairline all the way around the head,
starting at the ear on one side, french plait the hair down to the nape and around to the other ear, the braid should be thicker here and across the front, plait looser to create a thicker effect, once at he starting position, plait the remaining hair and pin underneath the initial plait at the back of the head.
2 Take the top halo section of remaining hair and seperate into two even sections, leave one inch from the perimeter of both sides, then take the hair, backcomb at the roots for structure and then roll the rat from tips to roots and secure just underneath the parting, repeat on the other side, criss-crossing the pins to secure the rat and hair into place.
3 With the one inch sections, curl the ends using a large tong and leave to cool, then take the section and smooth over the top of the now padded hair, gripping it at the midlengths around the underside of the rat toward the parting where the rat is gripped into place. This hair provides a smooth section to place over the top and because of the length and leaves around 4 inches of curls.
Make sure to leave a section at the back for plaiting.
4. Place the curls at random, spreading them around over the padded hair. Use the small section at te back to plait and sit over the parting area to cover any visible grips, bring this to the front of the padding and bring it back in a 'u' shape to create a teardrop at the front above the halo plait.
5 Spray the hair to hold and add the pins with pearls attached around the halo plait and between the halo plait and padding at random, add them down the center of the hair as well to accentuate the parting between the padding.
Tools-
Pin tail comb
Backbrushing brush
Rats
Pins/grips
Tongs/curlers
Hairspray
Decorative pins.


